Ok, the title sounds like technology bingo – three apparently unrelated technologies. Here is how they fit together …
I was looking for an app framework for a simple app I wanted to write for my Raspberry Pi 3. One of my requirements for the app was that it needs to run with Raspbian (Linux) as well as with Windows IoT Core installed on my Pi. The latter exclusively runs UWP applications, but UWP apps typically can’t run on Raspbian. So what to do here?
Qt support for UWP
A little know fact about the Qt application framework is that it is compliant with the UWP app model and API specifications. And I mean UWP proper here, not Desktop Bridge for PCs. So this means you can compile and package your Qt app as a UWP app package that can then run on any Windows 10 device – PC, Xbox, HoloLens, Surface Hub and Window IoT Core!
Even if you are building only for desktop PC, this can be interesting to consider if you want to take advantage of new Windows 10 UWP APIs or modern app deployment incl. Microsoft Store distribution. Last, and certainly not least, running your Qt app as UWP will let you take advantage of the AppContainer – the unsung hero of the Windows app platform. The AppContainer ensures that the app process won’t have any undesired impact on system stability or security by keeping it in a sandbox that is defined by UWP’s capability model. In this model, for example, a calculator app only gets the capabilities it needs. It won’t be able to use the internet, read arbitrary files from the disk or mess with the system’s registry. Even if the app has a bug and the process gets hacked it won’t be able to act outside of its sandbox.
In short, Qt is a great cross-platform option worth considering when you want to get the most out of Windows 10 and need to run the same code on Windows 7, Linux, Mac, Android or iOS.
Creating a Qt UWP sample app
First step is to install Qt on our development box from https://www.qt.io/download. Then launch the Qt Creator IDE to create your first Qt application – or select one of the examples that come with the tools.

Select an application type, such as “Qt Widget Application” and give it a name. Next comes the “Kit Selection” screen:

Let’s select one of the classic desktop kits and one of UWP kits (make sure the processor architecture works for your dev machine). Also be sure you select the UWP-ARMv7-MSVC2017 kit as we will need it for the Raspberry Pi. Then finish the project creation by accepting all the defaults. Now you can hit F5 to compile, launch and debug your project. Use the Selector control on the left pane to switch between classic desktop and UWP flavors to test your app code in both environments:
Side-track: Distributing via Microsoft Store
The UWP Release build output is in the right format for distribution via the Microsoft Store. There are a couple of steps/best practices to follow when submitting the application the Store. I’ll save those details for a future blog post as this is not required for getting the Qt app onto the Raspberry Pi, but to make sure this is indeed working seamlessly with the Qt framework I have taken one of the examples (the Qml Oscilloscope one) and actually put it in the Store – just for testing purposes. I have set it to be not searchable in the Store, but you can get to it and install the sample via this direct link: https://www.microsoft.com/store/apps/9NVKHDDVB44D
Deploying the Qt sample app to Raspberry Pi
The Qt Creator IDE doesn’t have the capability to produce UWP distribution packages (unlike Visual Studio), so you will have to create those manually before distributing the app to your devices. Here are the steps to get your Qt app deployed and run on your Pi (or other devices running Windows IoT Core for that matter):
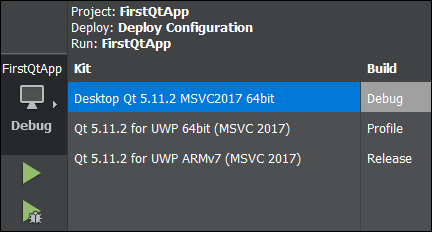
1. Select “UWP-ARMv7-MSVC2017” Kit and build as “Release”
Configure kit/build per below and then select Build->Rebuild All menu.

2. Create the .appx package file
In a developer command prompt, go to the build output folder. It should be called something like “build-FirstQtApp-Qt_5_11_2_for_UWP_ARMv7_MSVC_2017-Release”. Then run this command to create an .appx package named “qtapp.appx” from the contents of the “release” directory
makeappx pack -p qtapp.appx -d .\release
3. Sign the .appx package
Windows 10 devices only install .appx packages that are signed with a trusted certificate. So we will need to sign our package before we can run it. If you don’t have a certificate that is trusted on your devices (e.g. from Verisign etc.) you can create a test certificate and install it on your device – for testing purposes. The tools you need to create the test certificate and sign the .appx come with the Windows 10 SDK (which comes with Visual Studio 2017). Make sure <pn> matches what is specified as publisher name in the appxmanifest.xml file. Also note that qtapp.appx is the name you selected in the previous step for your package. For the names of qt.pvk, qt.pfx, qt.cer you can select whatever you want. For full details on these steps refer to the official documentation.
MakeCert.exe -r -h 0 -n "CN=<pn>" -eku 1.3.6.1.5.5.7.3.3 -pe -sv qt.pvk qt.cer
pvk2pfx.exe -pvk qt.pvk -spc qt.cer -pfx qt.pfx
signtool.exe sign -f qt.pfx -fd SHA256 -v .\qtapp.appx
4. Use Windows Device Portal to install the app on the Pi
With the Windows Device Portal application deployment and management is very easy. To get to the portal, get the IP address of your Pi and navigate to port 8080 (in my example 192.168.1.220:8080):
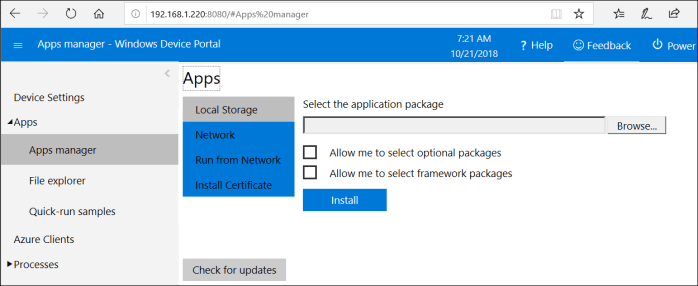
In the portal now go to Apps->Apps Manager to deploy your app with these steps:
- If you are using a test certificate, install it on your test device using the “Install Certificate” button. Just browse to the qt.cer file you created earlier and hit “Install”
- Depending on your app, you might have to select dependent framework packages. Those are listed in your appxmanifest.xml file in the build output. For that check the box and then get the required packages from “%ProgramFiles(x86)%\Microsoft SDKs\Windows Kits\10\ExtensionSDKs\”
- Browse to the qtapp.appx file you have created in an earlier step and hit “Install”
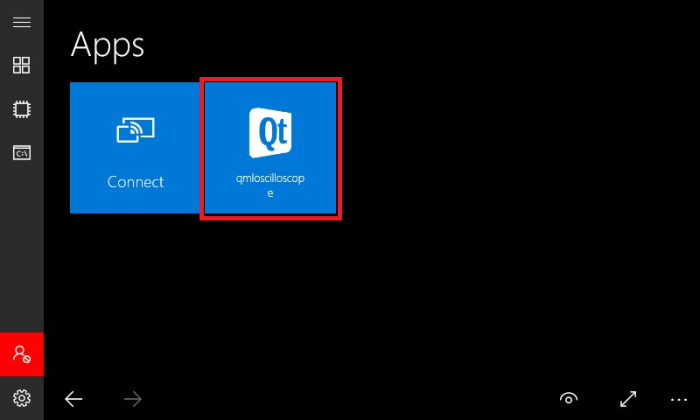
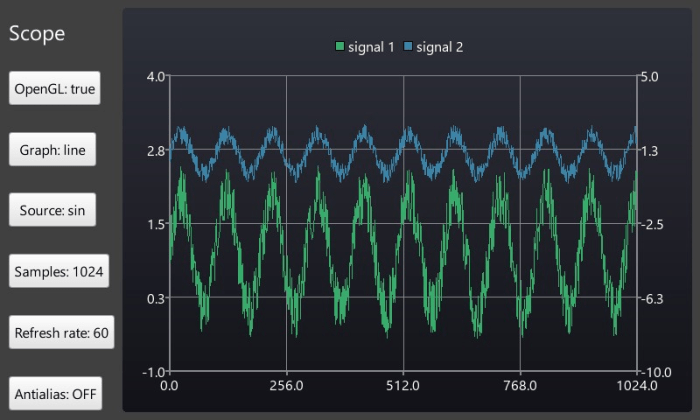
Now your app should be installed and ready to run. You can launch and manage its lifetime from the Apps Manager here in the portal. Or you can launch it manually via the standard Windows IoT Core Shell. For my experiment I picked the Qml Oscilloscope example:

Now you have your Qt app running on Windows IoT Core. The exact same app code can be compiled for and deployed to Raspbian (Linux) as well. The steps for this are well documented so I won’t go into it here. I recommend using this guide for Qt on Raspbian: https://wiki.qt.io/Raspberry_Pi_Beginners_Guide

Hi,
I’m using the similar environment(Raspberry Pi3 B+, QT5.15.0) as what you’ve mentioned in this article but there are some problems which I don’t understand.
In the step 1 (Select “UWP-ARMv7-MSVC2017” Kit and build as “Release”), you said, “Configure kit/build per below and then select Build->Rebuild All menu.”
What do you mean for “configure kit/build per below” and “select Build > Rebuild All menu”? Because for “Rebuild” in Build, there are 4 options which are
1. Rebuild All Projects
2. Rebuild All Projects for All Configurations
3. Rebuild Project “HelloQT”
4. Rebuild Project “HelloQT” for All Configurations
(HelloQT is my project name)
Could you please explain it more and tell me which Rebuild option I should choose?
Thanks so much.
LikeLike
Hi Vagrant – it’s been almost two years since I wrote this post and have used QT to build a UWP app for Windows IoT Core. It’s possible that the options in the tooling have changed. It would be best to refer to the official QT docs/support for answers to any questions here.
LikeLike