If you haven’t read part 1 , part 2 and part 3 of this series yet, please start there first. In this final part I will explain how to submit a UWP with desktop extension to the Microsoft Store.
The .appxupload File
The Store accepts .appx, .appxbundle and .appxupload files (as well as .xap files for Silverligt phone apps). For UWP apps with desktop extension components the best way to go is the .appxupload file. The VS Packaging Project produces this file for you and ensures it includes all the right binaries, assets and symbols. It’s an important thing to remember to create the .appxupload off the packaging project, not the UWP project in your solution. The latter will not be valid for Store submission.
To produce the .appxupload file, right-click on the packaging project in Solution Explorer, and select “Create App Packages …”

Now follow the instructions in the wizard and select the appropriate options like version number, architecture etc.

Once you hit “Create”, VS will produce the .appxupload file as well as test packages that can be used for local testing. At this point it is recommended to perform the following test activities:
- Launch the Windows App Certification Kit (from the dialog) to run all the applicable certification tests. Any failures in the mandatory certification tests will block your Store submission, so you will want to get on top of those right away. Note that there are also optional tests in the suite. Those point to potential problems in the app that may lead to problems on certain devices/configurations. Those failures won’t block the submission, but are rather warnings for you to take a look and double-check. A typical optional failure we are seeing with desktop extensions is the 4.2 Blocked Executable test. This test warns you if it detects code that potentially launches unsigned EXEs or utilities such as PowerShell, cmd.exe or reg.exe, as those are not allowed in Windows 10 S mode. Note that these may be false positives and won’t block your Store submission.
- Perform a final test pass of the packaged app, outside of Visual Studio. What I typically do is copy the *_Test folder under AppPackages to a clean test machine or VM (i.e. one that doesn’t have a VS development environment) and run the Add-AppDevpackage powershell script to install it in a way that is nearly identical to how your customers will install it from the Store. Then sanity check all important features of your app, including your desktop extension.

Adding ARM Configuration
If you are targeting Mobile with your UWP, you will need to provide ARM packages. In the current build of Visual Studio 2017 (Update 15.7) the packaging project does not create ARM packages by default. You will have to edit the .wapproj and add ARM support explicitly:
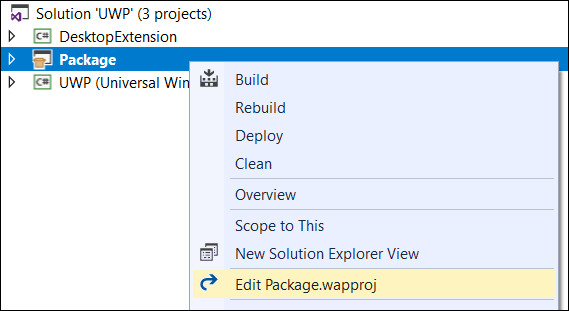
Now replace “AnyCPU” with “ARM”, as you won’t need the neutral configuration for the packaging project:
<ProjectConfiguration Include="Debug|AnyCPUARM">
 <Configuration>Debug</Configuration>
 <Platform>AnyCPUARM</Platform>
</ProjectConfiguration>
<ProjectConfiguration Include="Release|AnyCPUARM">
 <Configuration>Release</Configuration>
 <Platform>AnyCPUARM</Platform>
</ProjectConfiguration>
...
<PropertyGroup Condition="'$(Configuration)|$(Platform)'=='Debug|AnyCPUARM'">
 <AppxBundle>Always</AppxBundle>
</PropertyGroup>
<PropertyGroup Condition="'$(Configuration)|$(Platform)'=='Release|AnyCPUARM'">
 <AppxBundle>Always</AppxBundle>
</PropertyGroup>
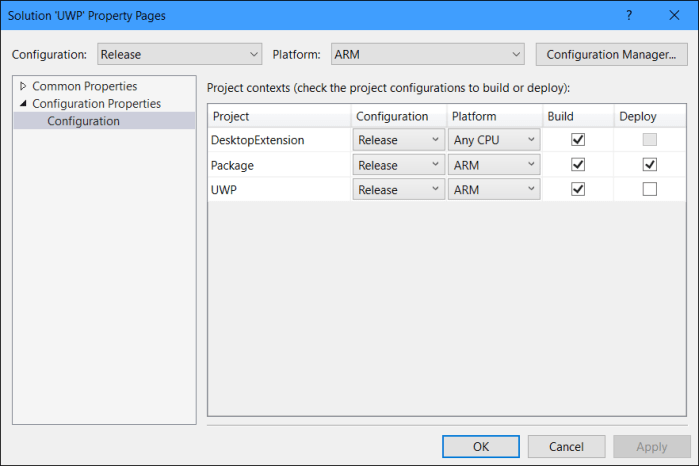
Once you have done those edits save the changes and reload the full solution (not just the project). Now you are set for building and submitting ARM packages (alongside your x86 and/or x64 packages).
It’s a good idea at this point to double-check the configuration properties in the solution for ARM. It should look like this:
Requesting ‘runFullTrust’ Approval
If you are submitting your UWP with desktop extension for the first time you will receive an error because you don’t have permission to submit apps with the ‘runFullTrust’ capability. To request access you are redirected to this form:
https://developer.microsoft.com/en-us/windows/projects/campaigns/desktop-bridge
Once you have submitted your info a Microsoft engineer will contact you and work with you through the onboarding process for your app. Once that is done you will be able to submit your app and any future updates just like for any other Windows Store application. We are working on making this initial onboarding process smoother and I appreciate your feedback. If you see any hiccups or delays going through the process please don’t hesitate to contact me and I will do my best to get you unblocked.
In Closing
This is it for my 4-part quick tutorial on how to make your UWP apps even better on PC by lighting up desktop extensions. What’s next? I have started to put together a number of concrete examples of activities that Windows Desktop apps typically need to perform outside of the sandbox, like integrating with legacy systems in LOB scenarios. Those I will blog about next and publish the samples in this repo – stay tuned for more on this coming soon …