Recently I moved to a new role within Microsoft and I am now working on the developer experience for Azure IoT. Going forward I will be shifting my blog activities to be more focused on IoT and Cloud development topics, across the diverse spectrum of technologies that is IoT today. To begin this transition I will start with a couple of introductory posts at the intersection of my previous and my current role: using the Azure IoT SDKs from UWP applications. In fact, if you are like me coming from a UWP/.NET background this is a great path to ramp up on Azure SDKs and to working with the cloud.
The Azure IoT SDKs for both the device and service side support a diverse set of programming languages and operating systems, including UWP on Windows 10. If you are using Windows IoT Core on your devices (“things”) then UWP is your choice for device app development. Also, if you are building a backend application for Windows 10 that connects to Azure IoT services, UWP can be the right tool for the task. In this first post I will focus on building a simple device application.
Building a Rating “Thing”
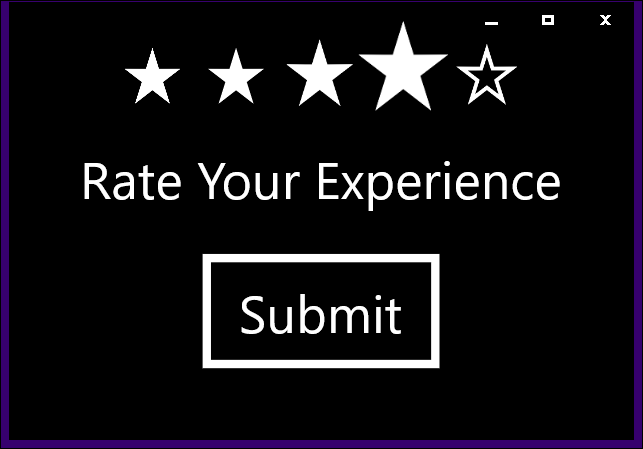
Simple goal for this first post: Using my Raspberry Pi 3, loaded with Windows IoT Core 17763 (aka 1809 update) I want to build a “thing” that lets customers rate their experience and sends that data to the cloud. You may have seen screens like this in airport bathrooms:
What do I need?
- Visual Studio 2017 with the latest updates
- Azure subscription (free trial subscription will be sufficient for this example)
- Raspberry Pi 3 (or any other device running Windows IoT Core)
If you don’t have an IoT device yet, you can still play along and use your PC as (simulated) IoT device. This is where the “universal” part of UWP comes in very handy because you will be able to run the same UWP app on both your PC and the device.
Preparation Steps
Azure Portal
Log into the Azure Portal and create an IoT Hub resource (choose the “Free Tier”)

Once the resource has been created, go to it and select “IoT Devices” from the left pane and click “Add”

Now pick a name for your device and click “Save”

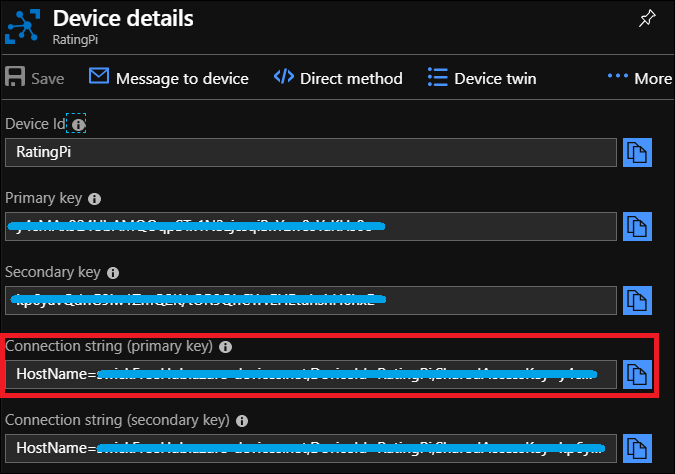
Last step is to select the newly created device in the list and copy its connection string from the device details. Store this in notepad or somewhere so can get to it in a later step easily.
If you want to test with more than one device, please repeat the above steps for each device. I’d recommend you create at least two devices: one for your Raspberry Pi and one for your PC, so can test from both and observe the data flowing into Azure from more than one device.
Device
If you are using your PC as (simulated) device then there is nothing else to do here. For your Raspberry Pi follow the official steps from docs.microsoft.com to set up the latest Windows IoT Core build (at the time of this writing it was build 17763). Setup, configuration and maintenance of your Windows IoT Core device is a breeze using the Windows 10 IoT Dashboard and the Windows Device Portal.
Visual Studio 2017
Just make sure you have the latest updates and the Universal Windows Platform workload selected as part of your setup:

Now there are three options for you to get the device app running and connected to Azure:
1. Install the app from the Store and start running it from your PC (as simulated IoT device)
You can find the pre-built sample app in the Microsoft Store at the below link. Install and launch it from there: https://www.microsoft.com/store/apps/9NGS2T2X166N
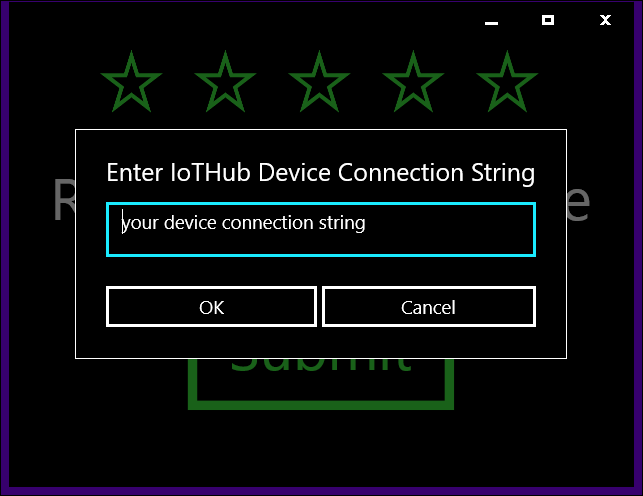
The device app needs to know what the respective device’s connection string so can successfully connect to the Azure IoT Hub. So copy the string you had saved in the earlier step and paste it here. Click OK and once the connection is established the controls will be enabled and you can start submitting your ratings.
For an initial quick verification that the messages are arriving in your IoT Hub, navigate to the Azure Portal a go to your IoTHub resource. In the overview section, click on the “Device to cloud messages” chart and verify that your messages are arriving as expected. This view of Azure Monitor data may take a minute or two to get updated:

2. Download the source from GitHub, build and run it on your PC (as simulated IoT device)
To learn about the code, step through it in the debugger, make modifications etc. you can get the VS solution from here:
https://github.com/wickste/RatingThing
Open the RatingThing.sln solution in Visual Studio make sure you select x86 or x64 as target architecture and hit F5 to run with the debugger. Again you will need to enter your device’s connection string.
3. Deploy the app to your Raspberry Pi and connect it to Azure
Now the interesting way to run it of course is on your actual device (e.g. Raspberry Pi). For that you want to put the respective device connection string in the code (at the top of MainPage.xaml.cs. Note that in a production scenario you would not be doing it this way. Instead you would be using the Azure IoT Hub Device Provisioning Service that enables secure device provisioning at scale.
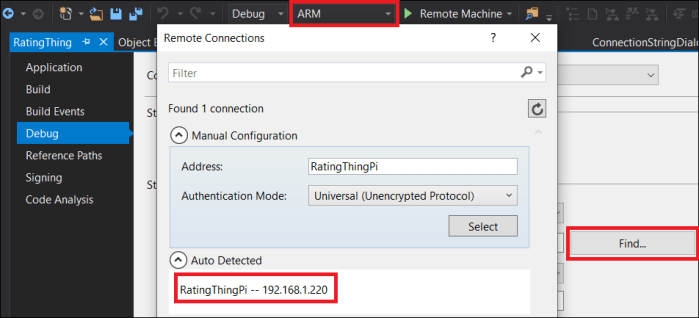
Next we set up VS for remote deployment and debugging for your Raspberry Pi. Select “ARM” as your architecture and “Remote Machine” as your target – then go into the Debug settings of your project properties to select the specific device you want to deploy to:
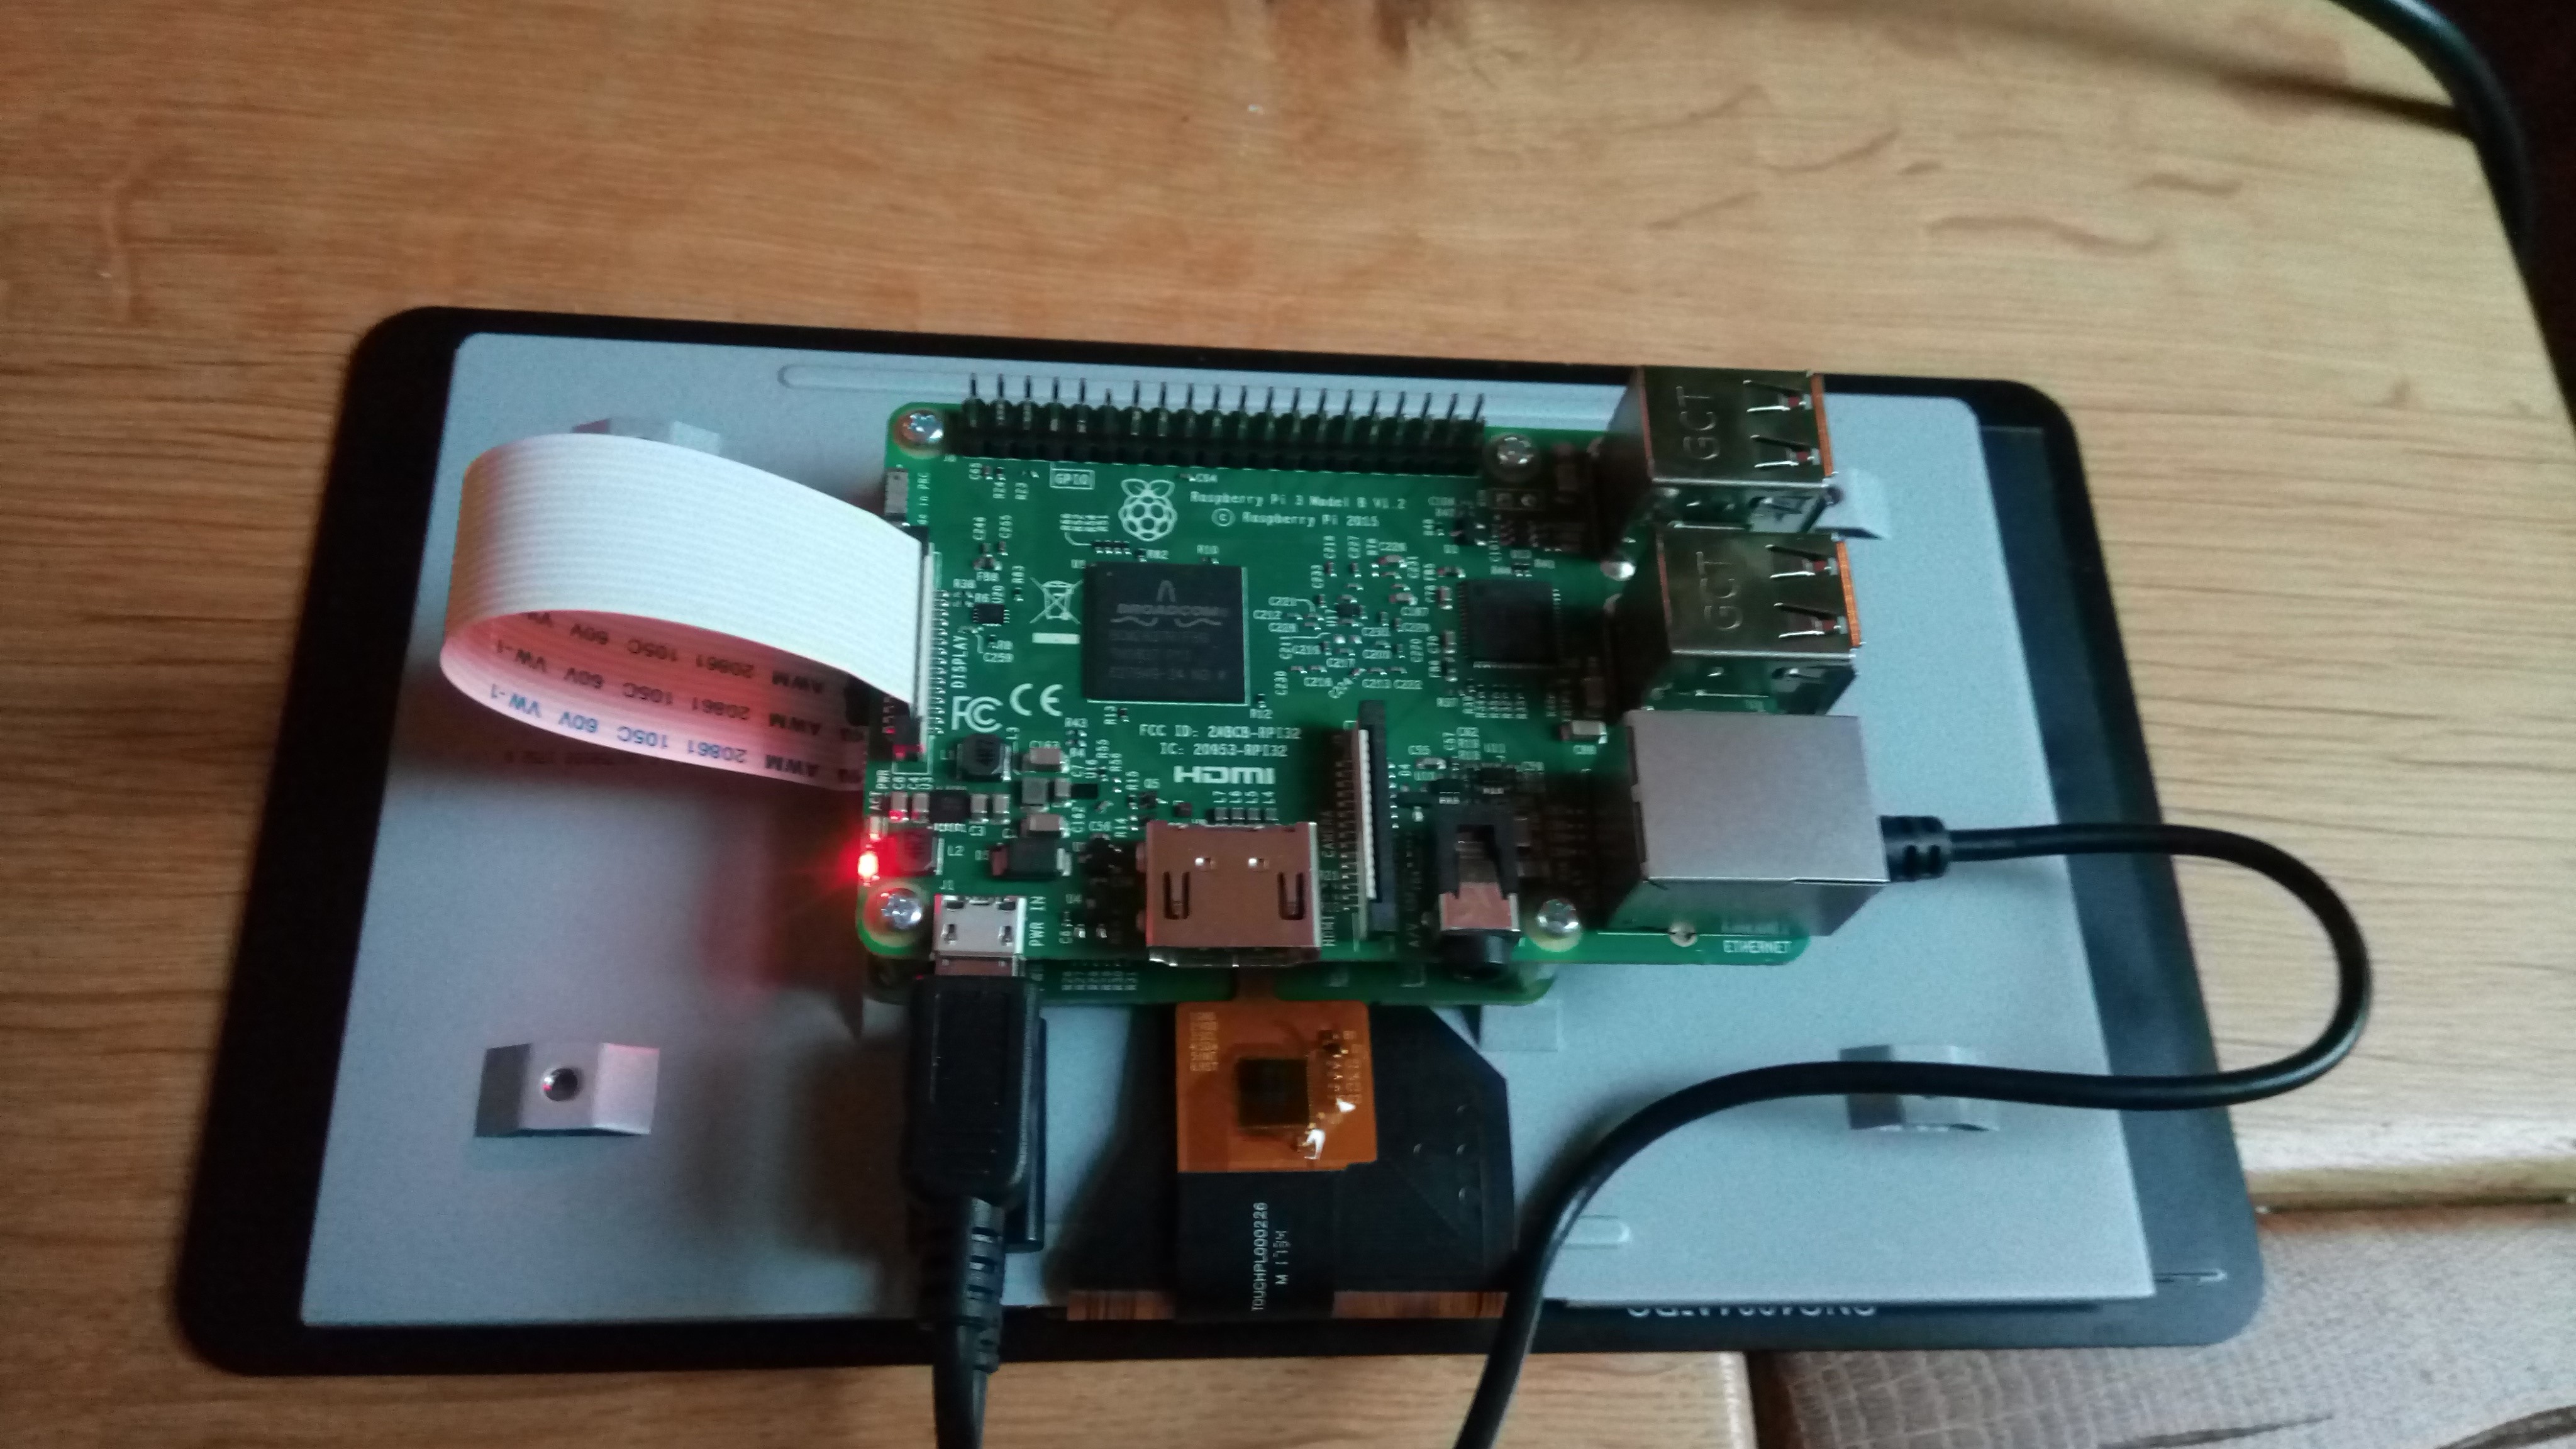
Now you can hit F5 to deploy and debug, just like you normally do for your desktop applications (just note that everything will be a bit slower …). So here we have it – our UWP app running on the Pi, connected to our Azure IoT Hub service:

Step-by-Step Code Review (full source here)
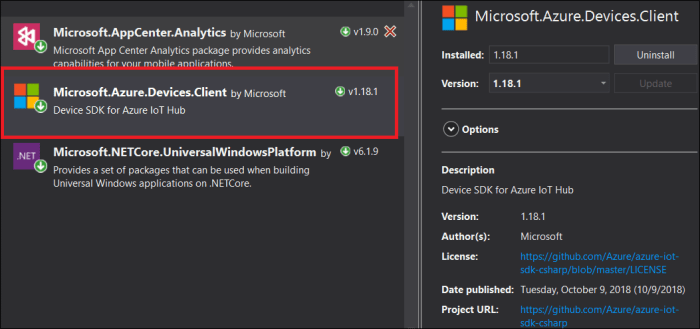
We start with the empty UWP app template and add a Nuget package for the Azure IoT Device Client SDK:
The XAML for our UI is extremely simply, thanks to the built-in RatingControl. Just stack the RatingControl on top of a TextBlock and a Button, and then wrap it all in a Viewbox for proper sizing on different display sizes:
<Viewbox Margin="24">
    <StackPanel>
        <RatingControl x:Name="ratingControl" IsEnabled="False"/>
        <TextBlock Text="Rate Your Experience"/>
        <Button x:Name="btnSubmit" Margin="12" IsEnabled="False"
                Content="Submit" Click="btnSubmit_Click"
                HorizontalAlignment="Center"/>
    </StackPanel>
</Viewbox>
Now we need to write the code to connect to our Azure IoT Hub, assuming we have obtained our device connection string (either from the dialog, or hard-coded in the source). Once our connection request has been processed we update the UI controls according to the connection status:
private void ConnectToAzure()
{

  iotHubClient = DeviceClient.CreateFromConnectionString(connectionString,
                                                         TransportType.Mqtt);
  iotHubClient.SetConnectionStatusChangesHandler(
    new ConnectionStatusChangesHandler(this.StatusChangesHandler));
  iotHubClient.OpenAsync();
}

private async void StatusChangesHandler(ConnectionStatus status,
                                        ConnectionStatusChangeReason reason)
{
  await this.Dispatcher.RunAsync(CoreDispatcherPriority.Normal, () =>
  {
    if (status == ConnectionStatus.Connected)
    {
      ratingControl.IsEnabled = true;
      btnSubmit.IsEnabled = true;
    }
    else
    {
      ratingControl.IsEnabled = false;
      btnSubmit.IsEnabled = false;
    }
  });
}
Last step to do is send the data whenever a customer provides their rating. In addition to the rating value, we also want to pass along some system health data to our backend. In this simple example I am adding the current memory usage to the telemetry message so we can build insights on the backend about our app’s health over time (subject of a future post):
private async void btnSubmit_Click(object sender, RoutedEventArgs e)
{
  ulong kiloBytes = MemoryManager.AppMemoryUsage / 1024;
  int rating = (int)ratingControl.Value;

  Message message = new Message();
  message.Properties.Add("rating", rating.ToString());
  message.Properties.Add("app-memory-usage", kiloBytes.ToString());

  await iotHubClient.SendEventAsync(message);
  ratingControl.ClearValue(RatingControl.ValueProperty);
}
That’s it. Pretty easy to get to this point thanks to Visual Studio, .NET & C# and the Universal Windows Platform. In the upcoming posts I will extend the solution on the cloud side and show several options for processing the data from our Rating Thing in Azure and taking action on the insights gained from our devices.